How Do I Change the Setup of the Console? (Updated July 2025)
One of the exciting features of our Axia Fusion audio system is the ability to save “preset” choices of channels for various purposes.
Our console has 16 channels, but we have more than 21 different audio sources available to use in the studio.
Therefore, we have created a couple of fader presets, called “profiles”, to allow quick access to different pieces of equipment in the studio.
For example ...
- Need quick access to all 4 studio mics for an interview in the air studio? Change to the Talk Show profile. You'll see another "Phone" option light up, too!
- Got an acoustic group that wants to perform in the air studio? Change to the All 5 Mics profile. You'll have access to the 4 studio mics PLUS the super-cool stereo microphone. Remember to use the Effects channel!
- Did someone else change the profile and forget to put everything back to "normal"?
These instructions detail how to "change profiles".
You can change the Axia Profiles at any time, live on-air,
and the listeners won't hear a thing.
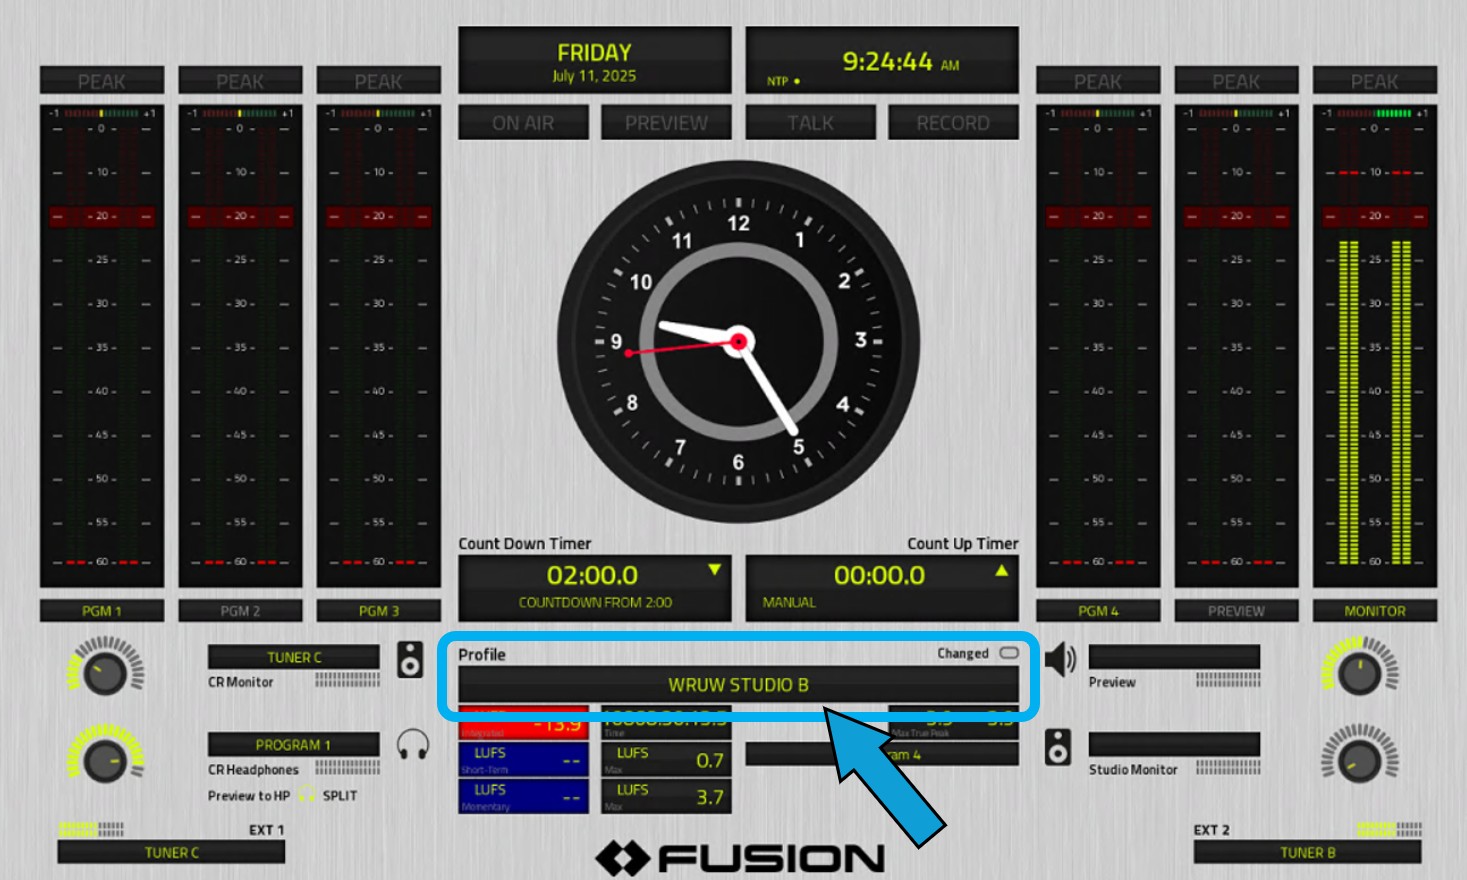
Step 1: Check the Current Profile Setting
Look at the Display Monitor for the console. The active profile name is displayed under the clock, Count Down and Count Up timers. It’s labeled Profile.
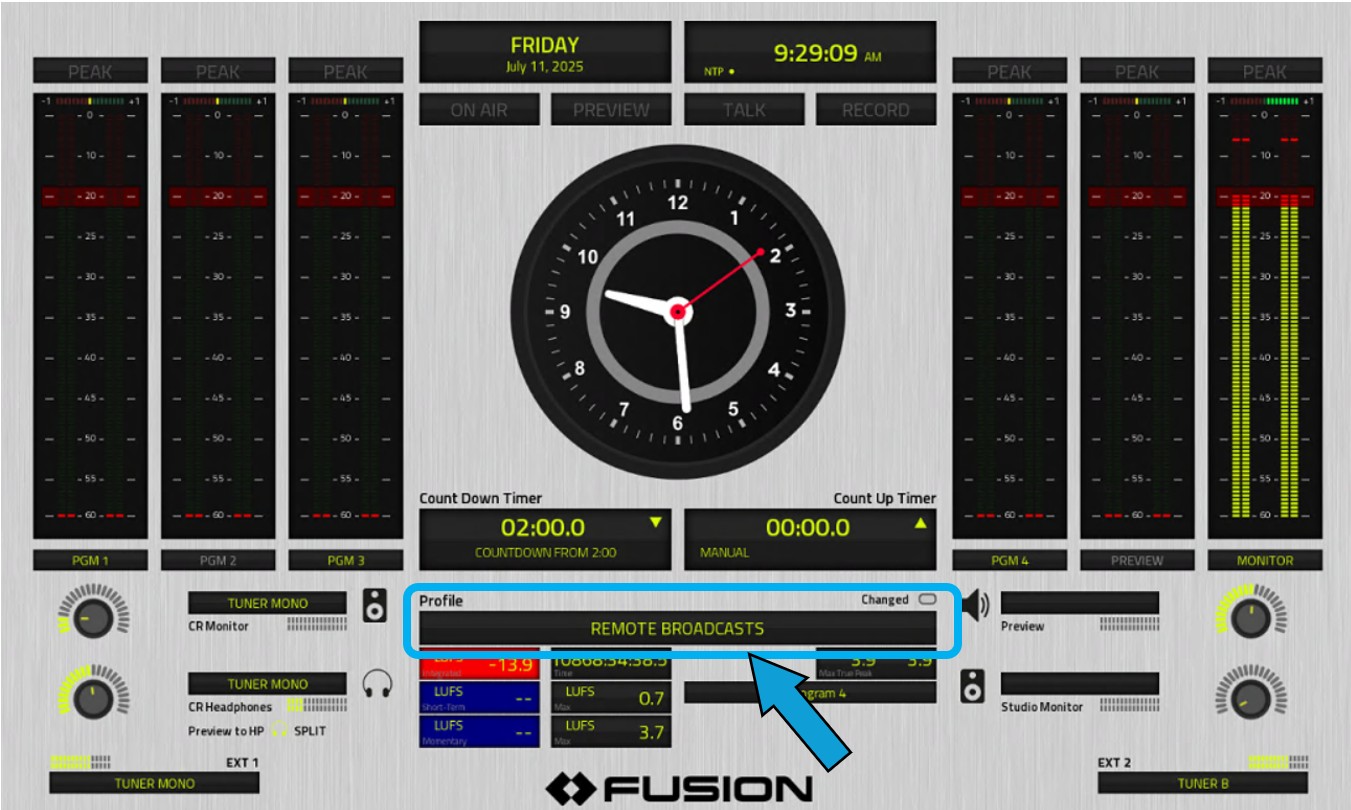
For most regular, single-programmer, recorded-music shows without interviews or live performances, the Profile should be as follows:
- Studio B: WRUW STUDIO B
- Studio C: NEW STUDIO C
Step 2: Press the "Load Profile" button
The Load Profile button is under the dialing keypad in the upper-right area of the console. Press it once.
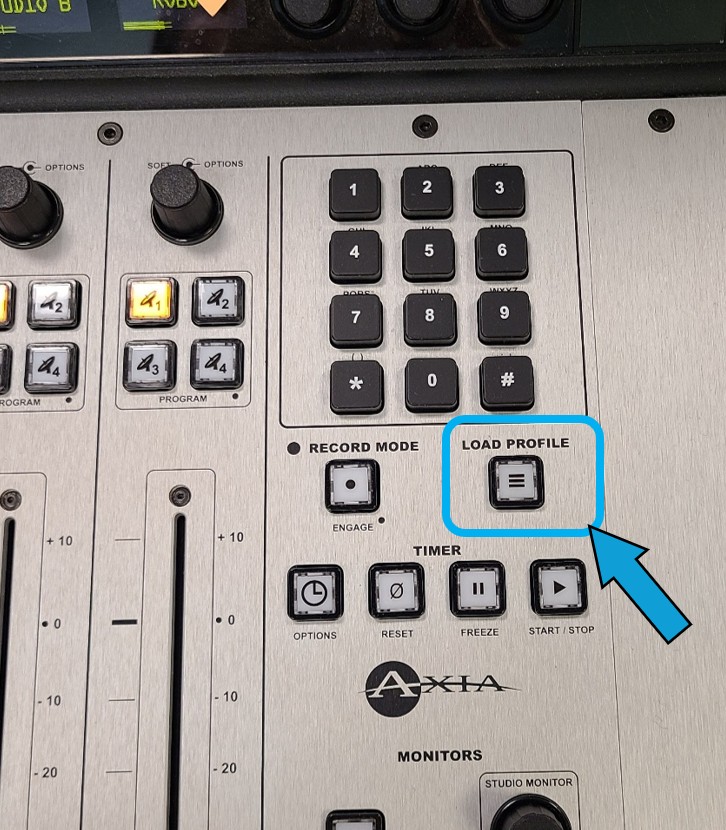
On the Display monitor, the clock will disappear and be replaced by a list of available profiles.

Step 3: Scroll to the Desired Profile Name
In the upper right area of the console are three rotary knobs (next to the display that reads "16"). Turn the LEFT rotary knob to scroll through the list of saved profiles.
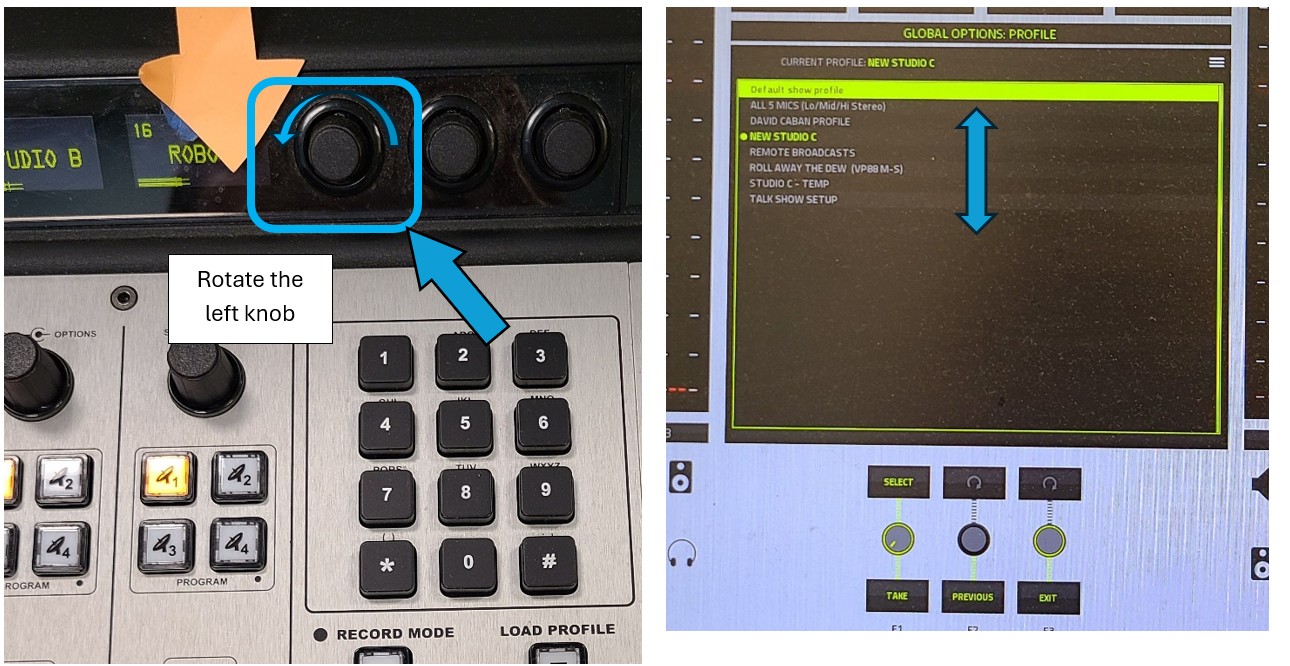
- FYI: The three knobs are represented electronically across the bottom of the Display Monitor. As you rotate the left knob, you should see it rotate on the screen.
- For most regular, recorded-music shows without large interviews or live performances, your Profile choice should be as follows:
- Studio B: WRUW STUDIO B
- Studio C: NEW STUDIO C
Step 4: "Lock in" / Select the New Profile
When the desired profile name is highlighted, PRESS the knob ONCE to "Take" your choice.
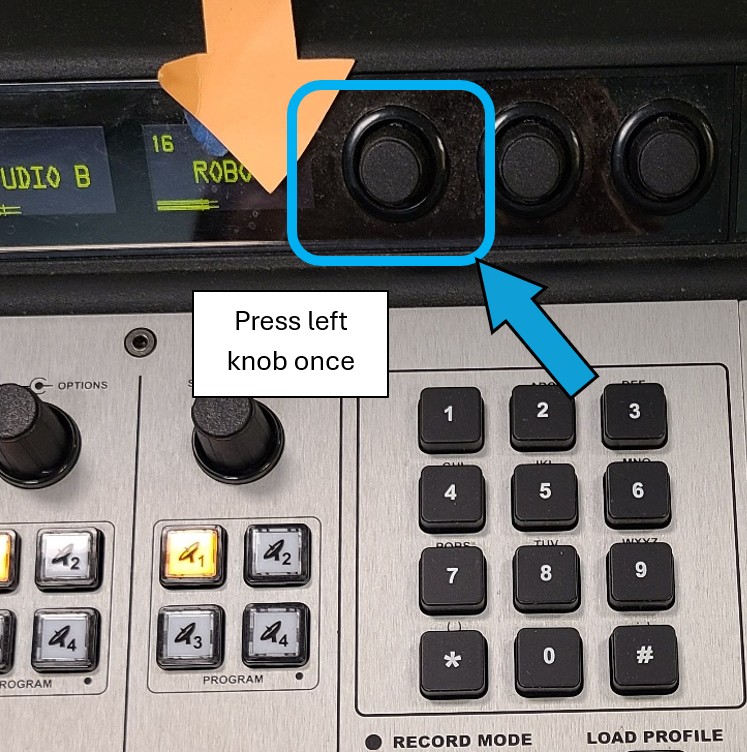
- The console will immediately switch over to the newly selected profile.
- You may see channel names change and buttons flicker. This is normal operation.
- If you have a channel ON at the moment of switchover, that channel will remain in its previous Profile state until you turn it OFF. Once OFF, all settings of that channel will revert to the new Profile.
- Some Profiles default to listening to the External air signal (often on the 12-second delay). Be sure to check that you are listening to Program 1.
- The listener will not hear any difference.
Step 5: Clear the Display Monitor and Confirm the Change
Press the Load Profile button again to clear the Display Monitor and return to the clock.
Confirm the Profile box under the Clock and Timers displays the name of the Profile you selected.
That’s it! You’re all done! You have changed profiles!
NOTE: If you have changed from the "Studio Standard" profile
to something else, please repeat the steps above to return to the
Standard profiles when finished.