How to Change Equipment Assignments on a Fader Channel (Updated April 2026)
How to Change Equipment Assignments on a Fader Channel
We ordered our console with 16 fader channels, even though we have approximately 20 signal sources in the studio.
We did this for two reasons.
1. Some of our signal sources receive limited use. For example, the output of the Live Mix Closet is used once a week. Mic 4 in Studio C, and CD4 in both studios is rarely used. Playback from the CD burner is rarely used.
2. We wanted to provide the ability to "customize" the console to a particular setup, while still maintaining a standard set of channels for use by 90% of the staff.
Many of the fader channels only have a few pieces of equipment programmed for the channel ... such as Mic 1, Mic 2, CD 1 and CD 2. Others, such as channel 14, have five or six choices to pick from.
To access other equipment in our studios, you have two options:
- Change the entire board 'profile'. We have setup a few presets in each studio, especially for Talk shows/Interview programs, live music in Studio C, and remote broadcasts.
- Change just one channel to a different source.
This knowledge article covers the process for #2, to change only one channel to a different source.
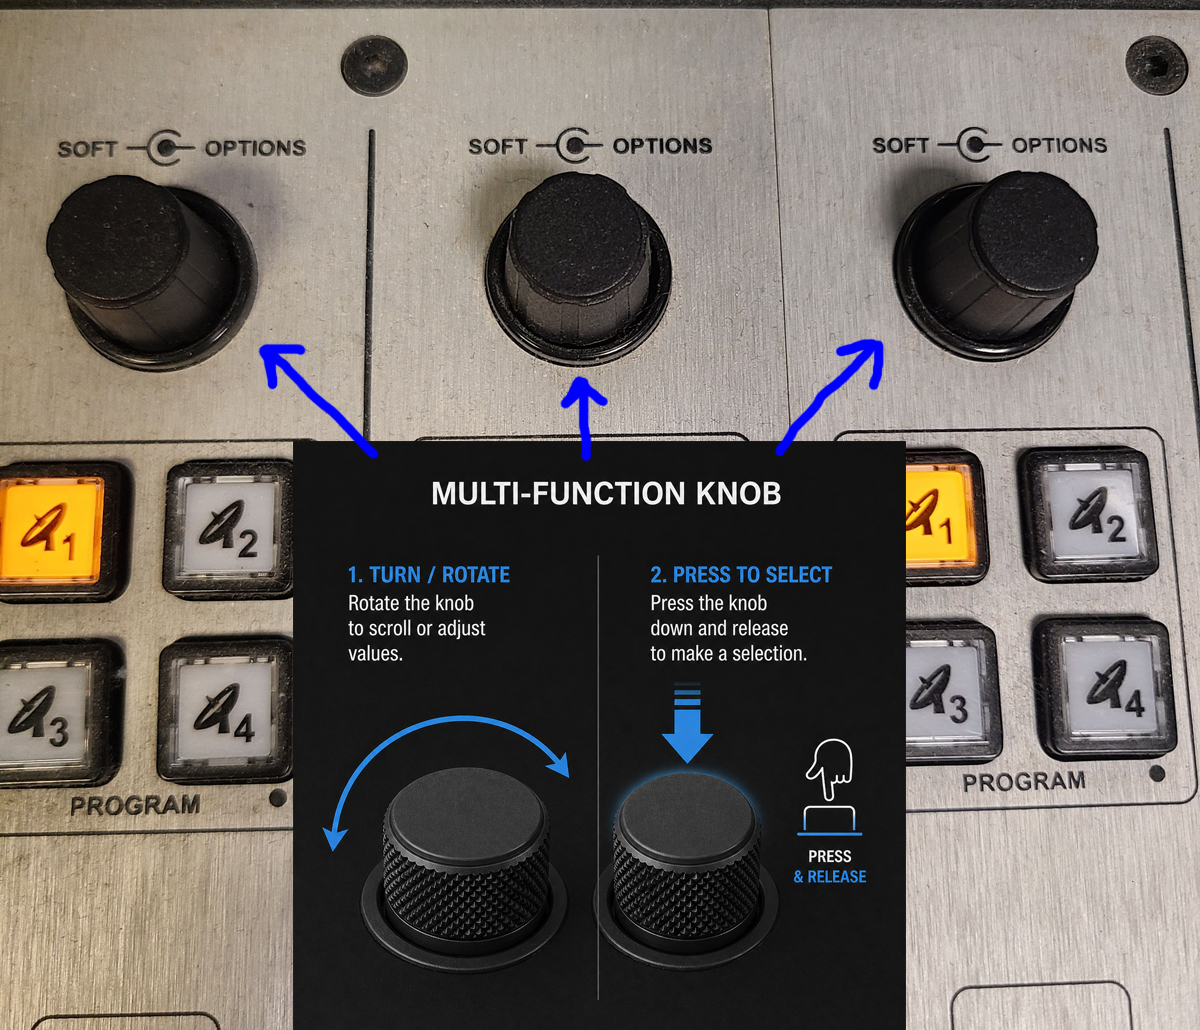
The Key: Use the Knob at the top of the desired channel
Changing sources on a channel requires using the multi-function knob at the top of the desired channel. The knob has two functions:
- You can ROTATE the knob to "scroll through options" or adjust values, and
- You can PRESS the knob to make a selection on the screen.
Step-by-Step Instructions
- DECIDE what source you want to put on which channel.
- Examples: "Put Mic 4 on Channel 16." "Replace Virtual DJ A on channel 9 with CD 4."
- Examples: "Put Mic 4 on Channel 16." "Replace Virtual DJ A on channel 9 with CD 4."
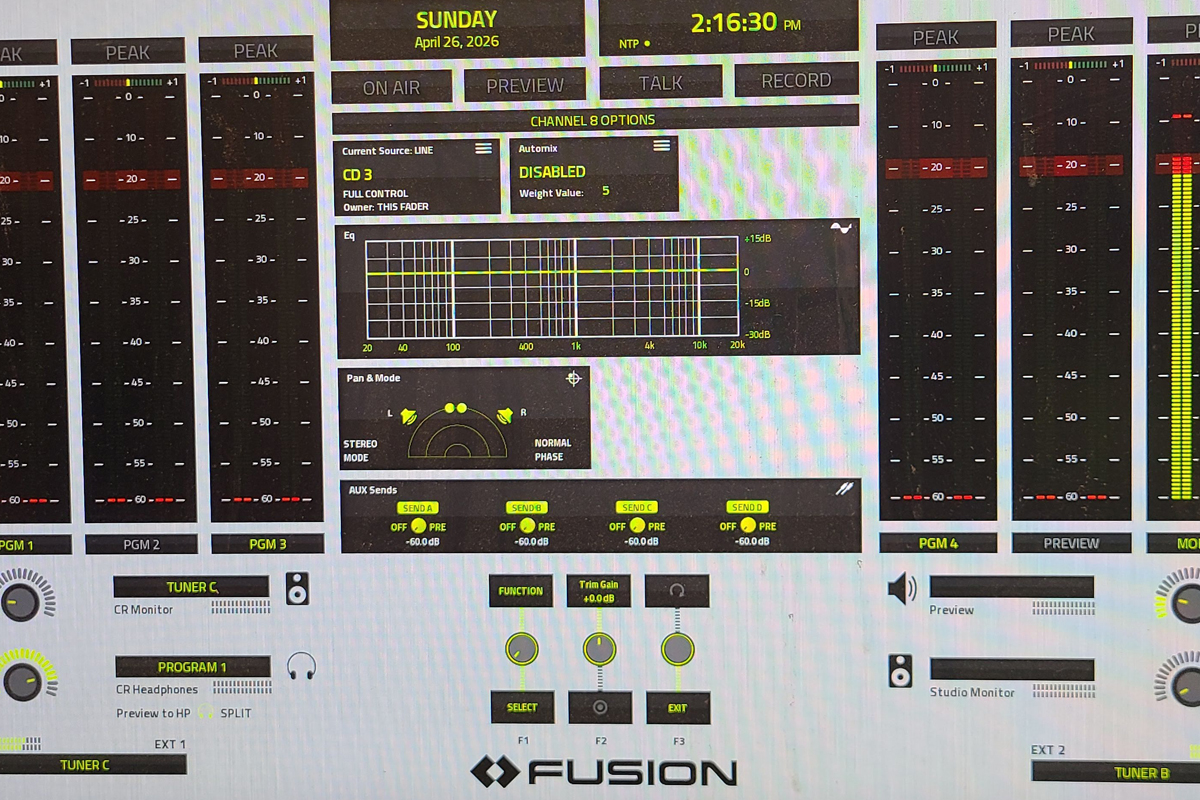
- PRESS AND RELEASE THE KNOB for the desired channel you want to change. Look at the Axia Display monitor.
- The clockface is replaced with a set of "channel options". Example:
- Note: If you pick the wrong channel, just press the knob on a different channel and the screen will automatically switch.
- The clockface is replaced with a set of "channel options". Example:
- ROTATE THE KNOB "one notch" to the Current Source block. Your goal here is to change the Current Source for the channel.
- The Current Source block will have a yellow border. (If a different block has a yellow border, simply ROTATE the knob until the Current Source block has the yellow border.)
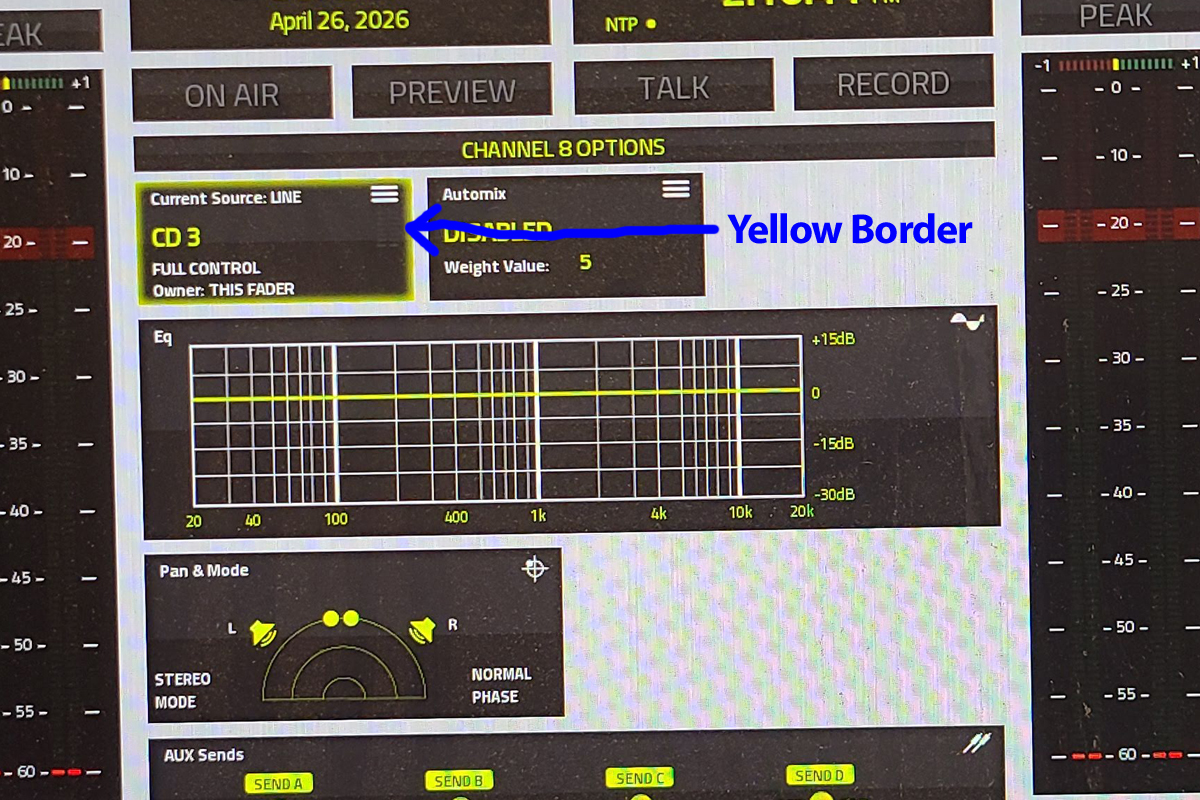
- The Current Source block will have a yellow border. (If a different block has a yellow border, simply ROTATE the knob until the Current Source block has the yellow border.)
- PRESS AND RELEASE THE KNOB to select the Current Source panel. You will see a list of all the sources that are available for that channel. At the top the screen shows the Channel number, plus the CURRENT SOURCE. In the list of available sources, the current source has a yellow dot next to the name of the source.
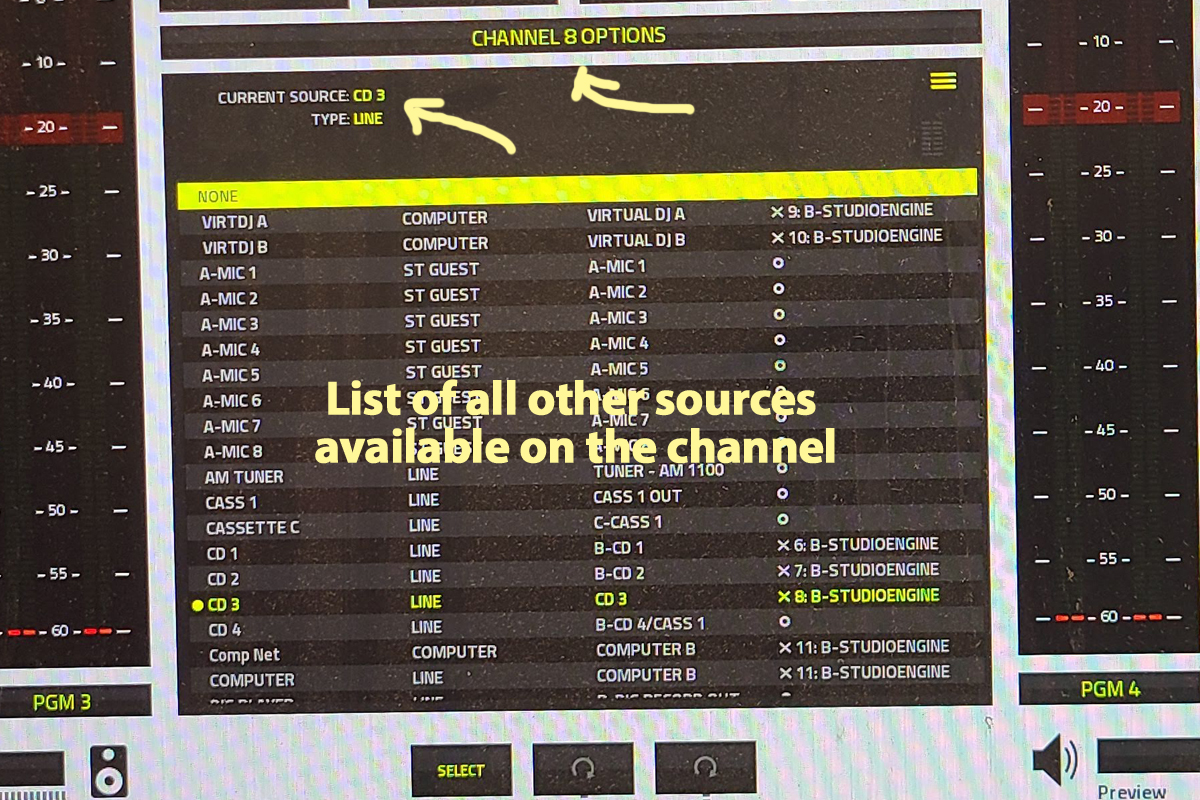
- ROTATE THE KNOB to move the yellow highlight bar up and down the list until the desired source is highlighted in yellow.
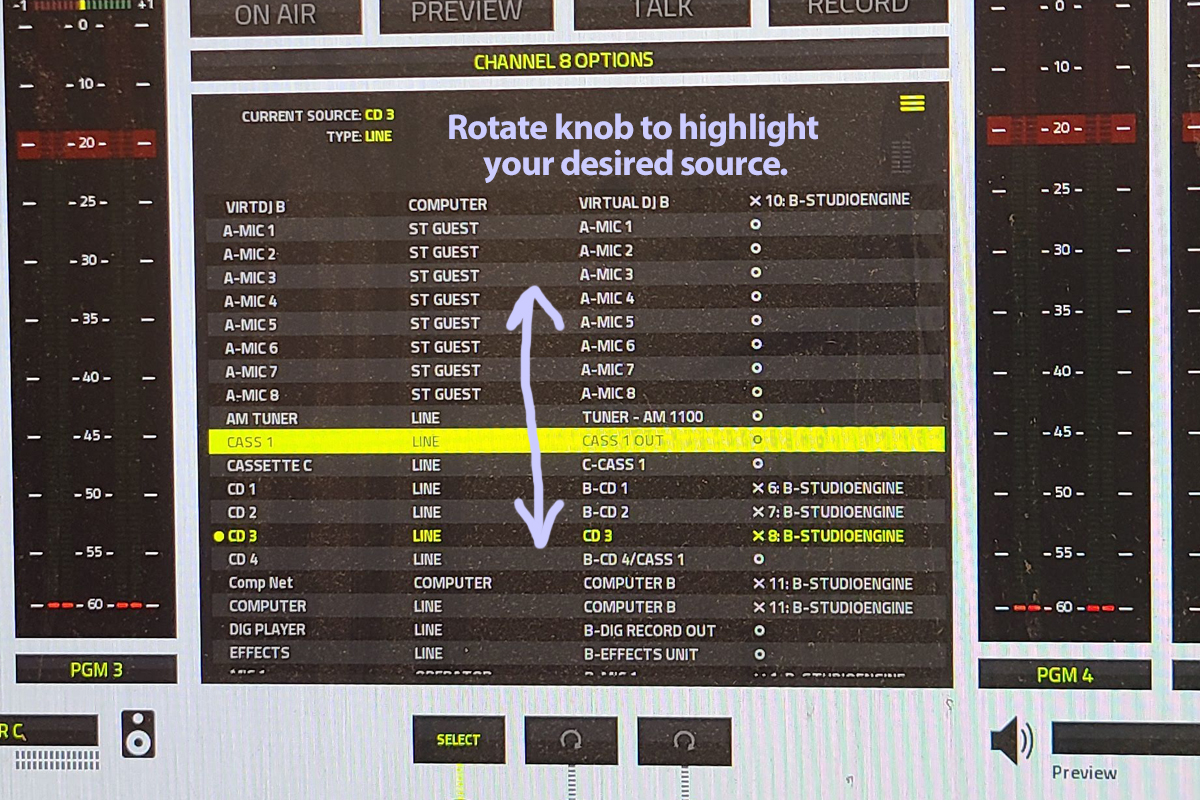
- PRESS AND RELEASE THE KNOB to select your desired source.
- The display immediately returns to the standard clock face.
- Your channel is now set up with the new source.
IMPORTANT - CLEAN UP AFTERWARDS
When you are done with the custom change to the board, follow these instructions to RESET THE BOARD to our defaults.